So its been forever and a day since I've updated this blog. With no air conditioning in the sewing room, NOTHING got done this summer. Its finally cool enough to venture back in.
I had started a nightgown for Ally from some silky type material that I picked up - I have no idea where I picked it up..LOL It came out horrible. My machine broke about 1/3rd of the way through, and I gave up. The machine sat broken for weeks.
Yesterday, I finally braved the room, took the machine apart, cleaned it all up and it WORKED! Go me. Made this awesomely cute Candy Corn T-shirt for Ally. I took 4 t-shirts - cheapo's from ACMoore. Cut a 2" strip from the white, orange and yellow. Then using the handy tip I'm seeing all over the internet, I set my tension as high as it could go with the longest stitch. It gave it a little ruffle. I wanted more - so I pulled on the threads. I then laid the ruffles out on a scrap piece of the white t-shirt, and sewed the ruffles down.
Since I'm a HORRIBLE at drawing, I had DH draw me a candy corn (yes, I really am THAT BAD!) on some heat and bond. Ironed it onto the wrong side of the ruffle scrap and then cut out the candy corn shape. That then got ironed onto my non-destroyed white t-shirt and for extra security I sewed around the entire design. She LOVED IT and ran off with it before I could get a picture of it.
Feeling awfully proud of myself, I decided to make her a t-shirt dress. OOOH BOY. I should have stopped while I was ahead. I took another cheapo ACMoore t-shirt. Chopped it off about 4"below the armpits (mistake #1 - I should have cut it at 2" for an empire waist). Then I took a large flower print that DH hated and had been sitting in my stash and created a skirt for the dress. Tried it on Ally and YIKES - it looked like she was wearing a giant muu-muu and I had somehow managed to get the skirt seam to end up 3" towards the front of the dress instead of the side like I had wanted.
I refused to give up though. I added a casing to the waist to try and give the dress some definition (even though DH was already proclaiming it the ugliest thing he ever saw). I really should have just stopped.
The casing was just b-a-r-e-l-y big enough to get my 1/4" elastic through. So tight I bent my metal threader thingy (technical term). Finally got it through and then I couldn't get the dress evenly spread around. I had close to 4 inches of elastic stuck just hanging out. Thinking this was the BACK of the dress, I gave up, sewed it down and put it back on Ally. You guessed it - it was the front of the dress. So I have a nicely fitted back side and still muu-muu in the front. Sigh.......
No pictures. It was just too horrible.
Tuesday, October 25, 2011
Wednesday, June 29, 2011
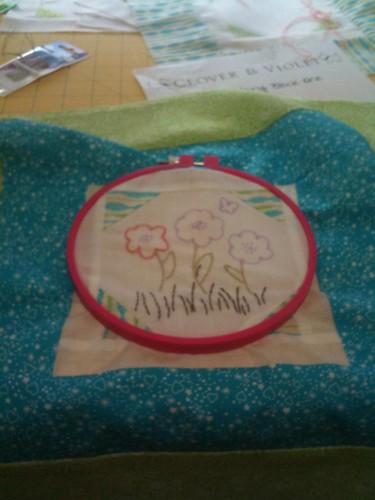
Embroidery 101 - Block 1
So I started actually embroidering the 1st block. I kind of love and kind of hate it. Its very zen if I can get the perfectionist in me to SHUT THE HECK UP!
Ya - equally sized stitches, not so good at that. Here's a shot of the partially finished block. I actually got the butterfly and the right flower outline done, but by then there wasn't enough light to get even a crappy shot from my phone. One day I'll think to bring my camera up into the sewing room.
Ya - equally sized stitches, not so good at that. Here's a shot of the partially finished block. I actually got the butterfly and the right flower outline done, but by then there wasn't enough light to get even a crappy shot from my phone. One day I'll think to bring my camera up into the sewing room.
Tuesday, June 7, 2011
Embroidery 101: Piecing part 1
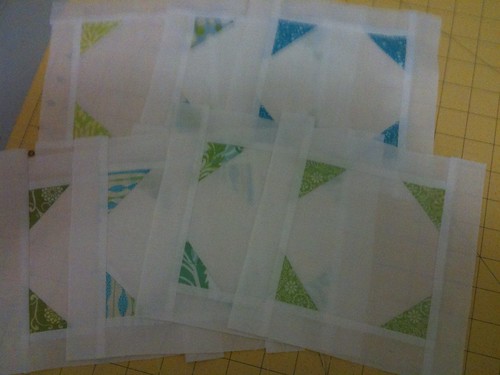
Its HOT in here. Whiney hot. Giving up, hot. I managed to get this far. As you can see I'm 2 short. My bobbin just ran out and I'm throwing in the towel for today.
I've got some wonky "squares". I'm blaming the heat. No worries though, they should square out nicely in the end, probably around 18.25 instead of 18.5.
Monday, June 6, 2011
Embroidery 101: Stitch and Quilt Along - Cutting
Phew - I suddenly remember why I choose sewing clothes over quilting. I'm not a fan of taking a gigantic rectangle of fabric, cutting in to a bazillion smaller pieces, just to sew it all back together! LOL
I pushed through though. Tomorrow I'm going have to try and bang out piecing everything. Its suppose to get H-O-T here by Thursday (97+) and we stole the AC that normally goes in my sewing room for our bedroom. If I don't get it pieced tomorrow it might have to get put on hold for a while (at least until the weekend when I can try and get a new unit for this room).
I had 1 major issue cutting the fat quarters...Apparently JoAnn's fat quarters aren't very generous. Or hey, even 18", but who's measuring? Oh, right - me! I needed 18 USABLE inches out of each fat quarter. NOT HAPPENING with the ones I bought. Case in point:
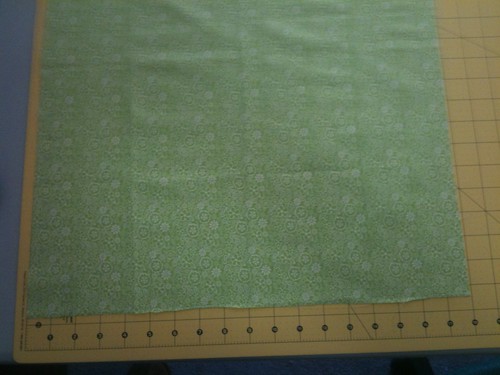
fabric looks really wrinkled but pinkie swear it is flat on the cutting table
I pushed through though. Tomorrow I'm going have to try and bang out piecing everything. Its suppose to get H-O-T here by Thursday (97+) and we stole the AC that normally goes in my sewing room for our bedroom. If I don't get it pieced tomorrow it might have to get put on hold for a while (at least until the weekend when I can try and get a new unit for this room).
I had 1 major issue cutting the fat quarters...Apparently JoAnn's fat quarters aren't very generous. Or hey, even 18", but who's measuring? Oh, right - me! I needed 18 USABLE inches out of each fat quarter. NOT HAPPENING with the ones I bought. Case in point:
fabric looks really wrinkled but pinkie swear it is flat on the cutting table
If you notice - the fabric does not make 18" and this wasn't even the worst of the lot, just a general idea of what all of them were like. Once I got it on grain (were the people drinking when they cut these?!!) I was left with maybe 17.5" of usable fabric - so it was 2 fat quarters per print for me!!
Well without further ado - here's the fabric cut into pieces.

Well without further ado - here's the fabric cut into pieces.
Itty Bitty Baby Dress
I found this adorable pattern at Made by Rae and just KNEW it would be the perfect baby shower gift for a friend of mine.
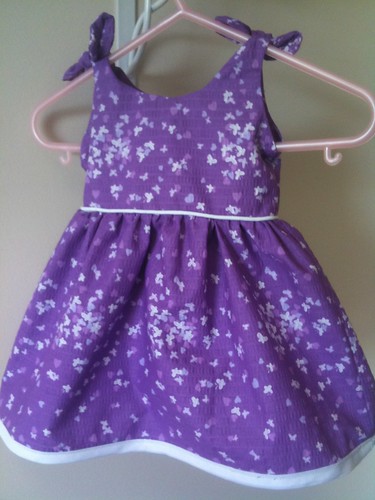
The fabric was leftovers from Ally's Easter Dress, which I've yet to document. Have to get on that...
The directions are very clear, although after constructing the entire dress I realized that there is no way to hide the inside waist/skirt seam. If I make another one (and I'm sure I will!) I will cut the lining pieces longer. I think I will also try out sewing the front to the back at 1 side, attach the piping, then close it up to catch the piping ends in the seam.
The dress is adorably small and ALMOST makes me wish I was having another little one...Almost
The fabric was leftovers from Ally's Easter Dress, which I've yet to document. Have to get on that...
The directions are very clear, although after constructing the entire dress I realized that there is no way to hide the inside waist/skirt seam. If I make another one (and I'm sure I will!) I will cut the lining pieces longer. I think I will also try out sewing the front to the back at 1 side, attach the piping, then close it up to catch the piping ends in the seam.
Friday, May 27, 2011
Embroidery 101: Stitch and Quilt Along
I've decided to join the Stitch and Quilt along over at Clover And Violet. The quilting I've got down - the embroidery? This could be interesting. LOL
I'm not entirely 100% in love with my fabrics, so don't be surprised if they change. I was hoping to pick up the fat quarters at JoAnn's today, but my local one didn't have any single ones (which were supposed to be on sale) - so I grabbed a pack of 5 (bottom of picture) and stole 4 cuts out of my stash. I think some of the fat quarters are a little dark for the brighter colors in my stash. Didn't have time on my lunch break to wait in the gimundo line at the cutting table to get anything else.

I'm not entirely 100% in love with my fabrics, so don't be surprised if they change. I was hoping to pick up the fat quarters at JoAnn's today, but my local one didn't have any single ones (which were supposed to be on sale) - so I grabbed a pack of 5 (bottom of picture) and stole 4 cuts out of my stash. I think some of the fat quarters are a little dark for the brighter colors in my stash. Didn't have time on my lunch break to wait in the gimundo line at the cutting table to get anything else.
Thursday, November 4, 2010
McCall's 5498 The Princess Dress
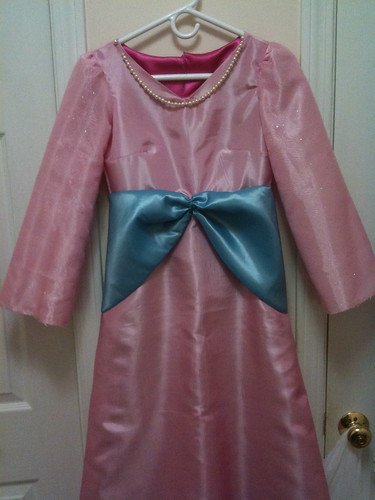
Picture is before I added the elastic to the sleeve ends.
Pattern Description:

MISSES’, CHILDREN’S AND GIRLS’ MERMAID AND PRINCESS COSTUMES: Long dress has semi-fitted lined bodice, contrast peplum with or without button trim; slightly flared or contrast straight skirt, and back zipper closing; costume A has contrast sleeves with elasticized wrist and attached contrast shoulder drape with large button trim; costume B has contrast bodice overlay, armhole ruffles and fish tail; crown has elastic casing, with or without button trim
Pattern Sizing:
3/4 to 7/8. I made the 7/8.
Did it look like the photo/drawing on the pattern envelope once you were done sewing with it?
Kind of. I ditched the shoulder drape. Its drafted way too big and completely overtook the dress. If you want it, I would suggest shortening it drastically.
I also fully lined the bodice & skirt and used taffeta & Fairy Dust Organza for the sleeves instead of just organza to add a little bit of warmth while trick or treating.
Were the instructions easy to follow?
Very. No problems at all.
What did you particularly like or dislike about the pattern?
Like I said, the shoulder drape was ridiculously big. Wish I had taken a picture of it before I ripped it out.
Fabric Used:
Pink and blue taffeta, fairy organza from Fabric.com
Pattern alterations or any design changes you made:
Fully lined. Sleeves are organza over taffeta and added a pearl necklace - which ended up breaking and I had to do an emergency re-beading right before we went out. LOL
Also for the peplum, instead of trying to do a hem on it, I just cut 2 out, sewed right side together and then turned right-side out.
Would you sew it again? Would you recommend it to others?
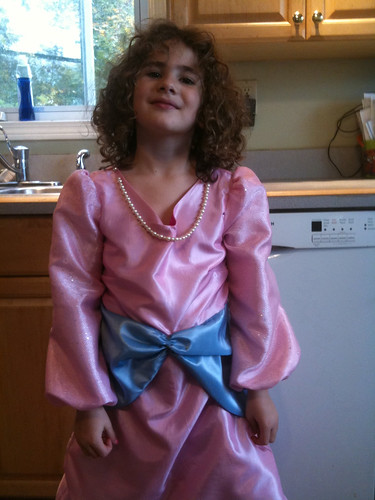
Yes! My daughter absolutely loved it.
Conclusion:
Great pattern. Carefully measure shoulder drape or ditch it entirely.
Another view with DD wearing it.
Subscribe to:
Posts (Atom)